
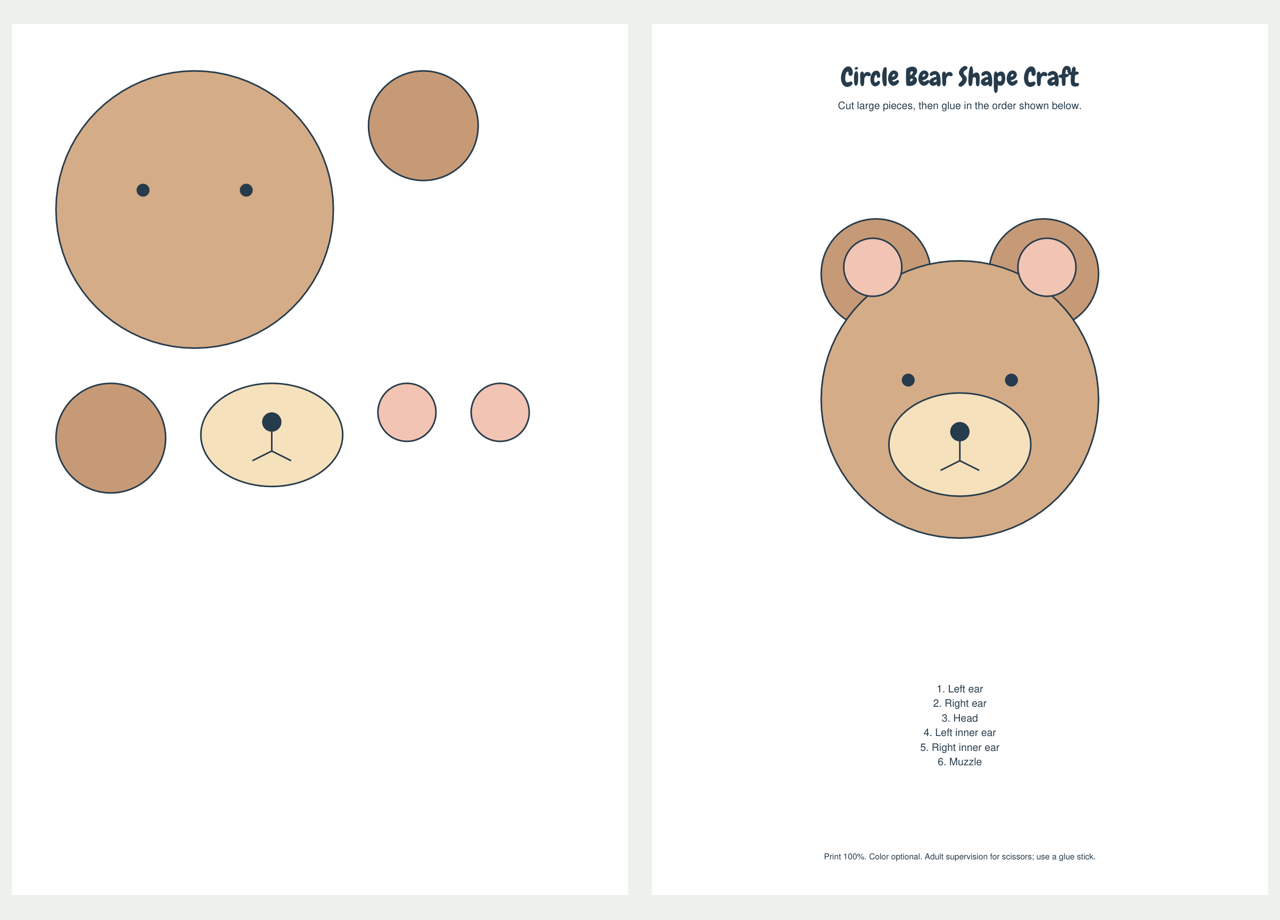
Build a friendly bear face from six large flat pieces: a round head, two ears, two inner-ear circles and one muzzle. The eyes are already printed on the head, and the nose and mouth are printed on the muzzle. You do not need to cut out tiny black eyes or assemble a moving toy.
Get the Paper and Tools Ready
Choose the A4 or US Letter version for your paper and print at actual size or 100%. Turn off fit-to-page if you want the cutting pieces to match the reference scale. Use ordinary paper for a lightweight picture, or paper/card that your printer can handle. Have a separate backing sheet, scissors and a glue stick ready. An adult can help with cutting. Start by laying the pieces out without glue.
Find the 6 Large Pieces
The head is the largest circle. The two outer ears are equal-size tan circles, while the smaller pink circles fit inside them. The pale muzzle is a broad oval, with its nose above the mouth. Keep the printed face details facing upward as you cut. The two ears are interchangeable, but their smaller pink circles should stay in front of them.
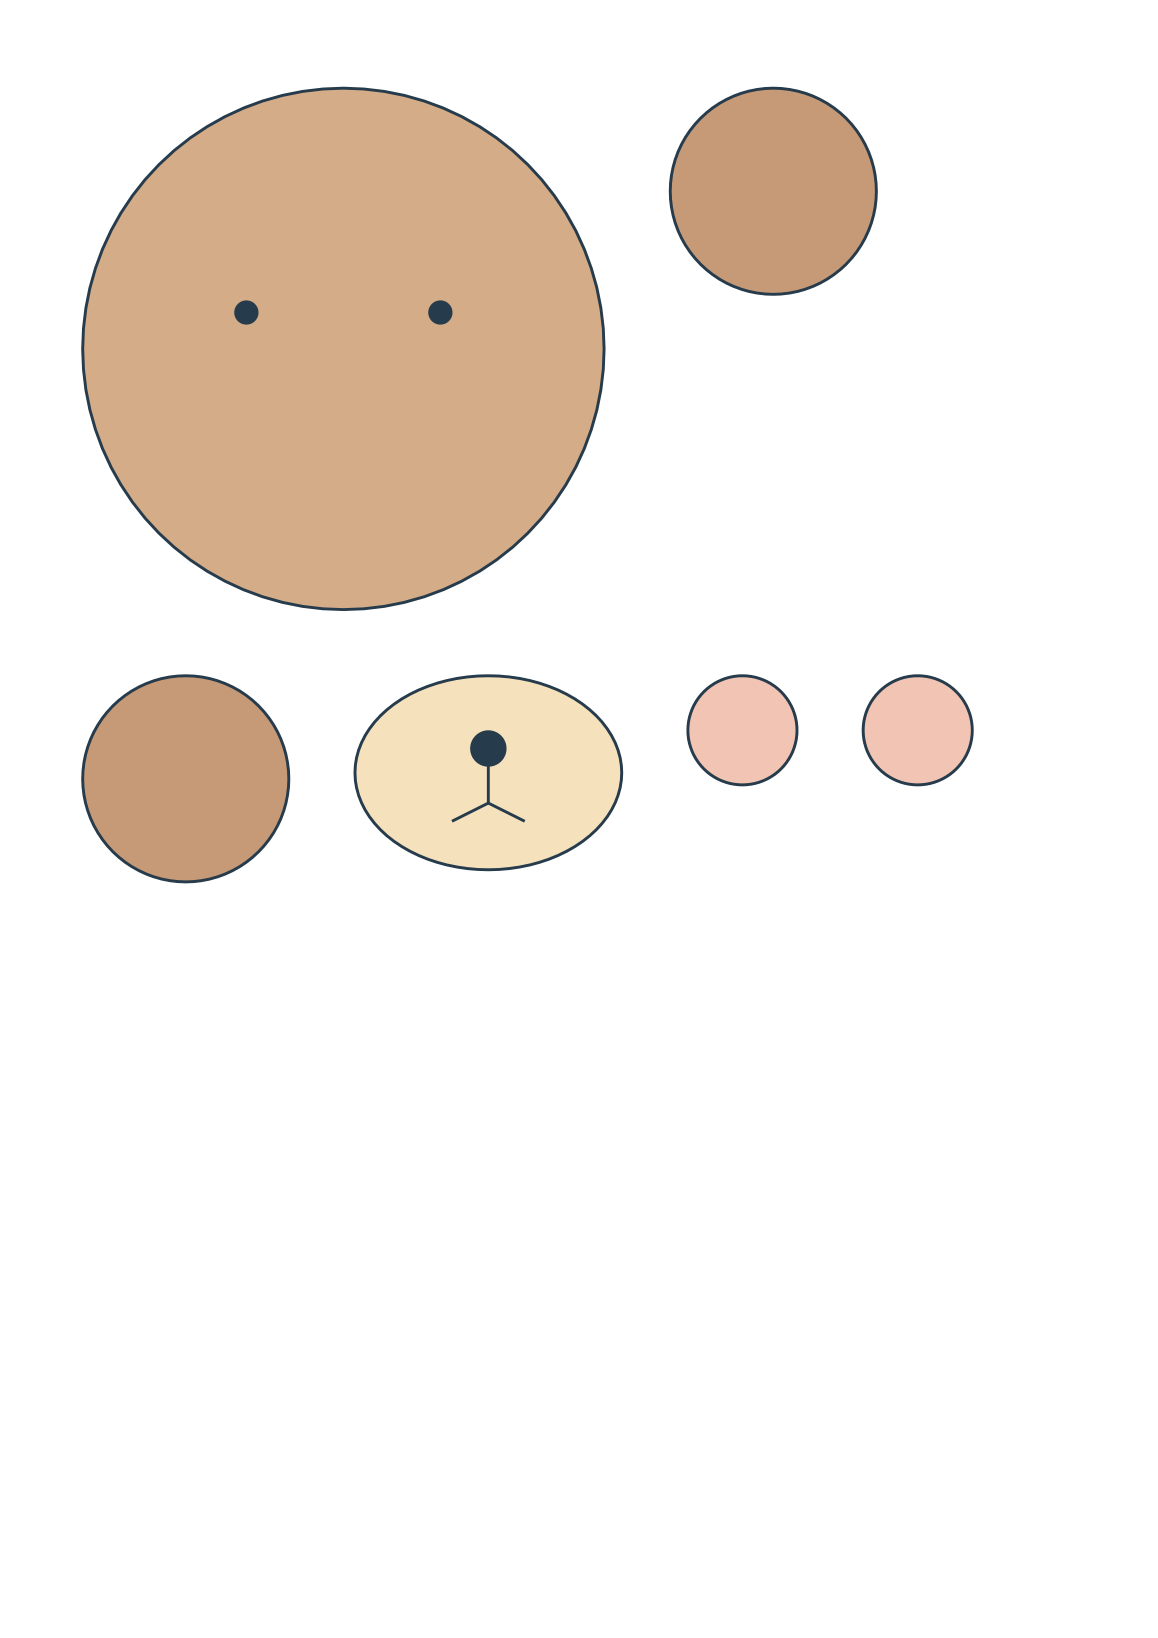
The cutting sheet has no title or footer inside its working area. Cut around each outside shape and keep the printed details on the pieces. The reference uses exactly the same piece geometry and scale as the cutting page. You can choose your own backing color without changing the paper shapes.
Put the Layers Together
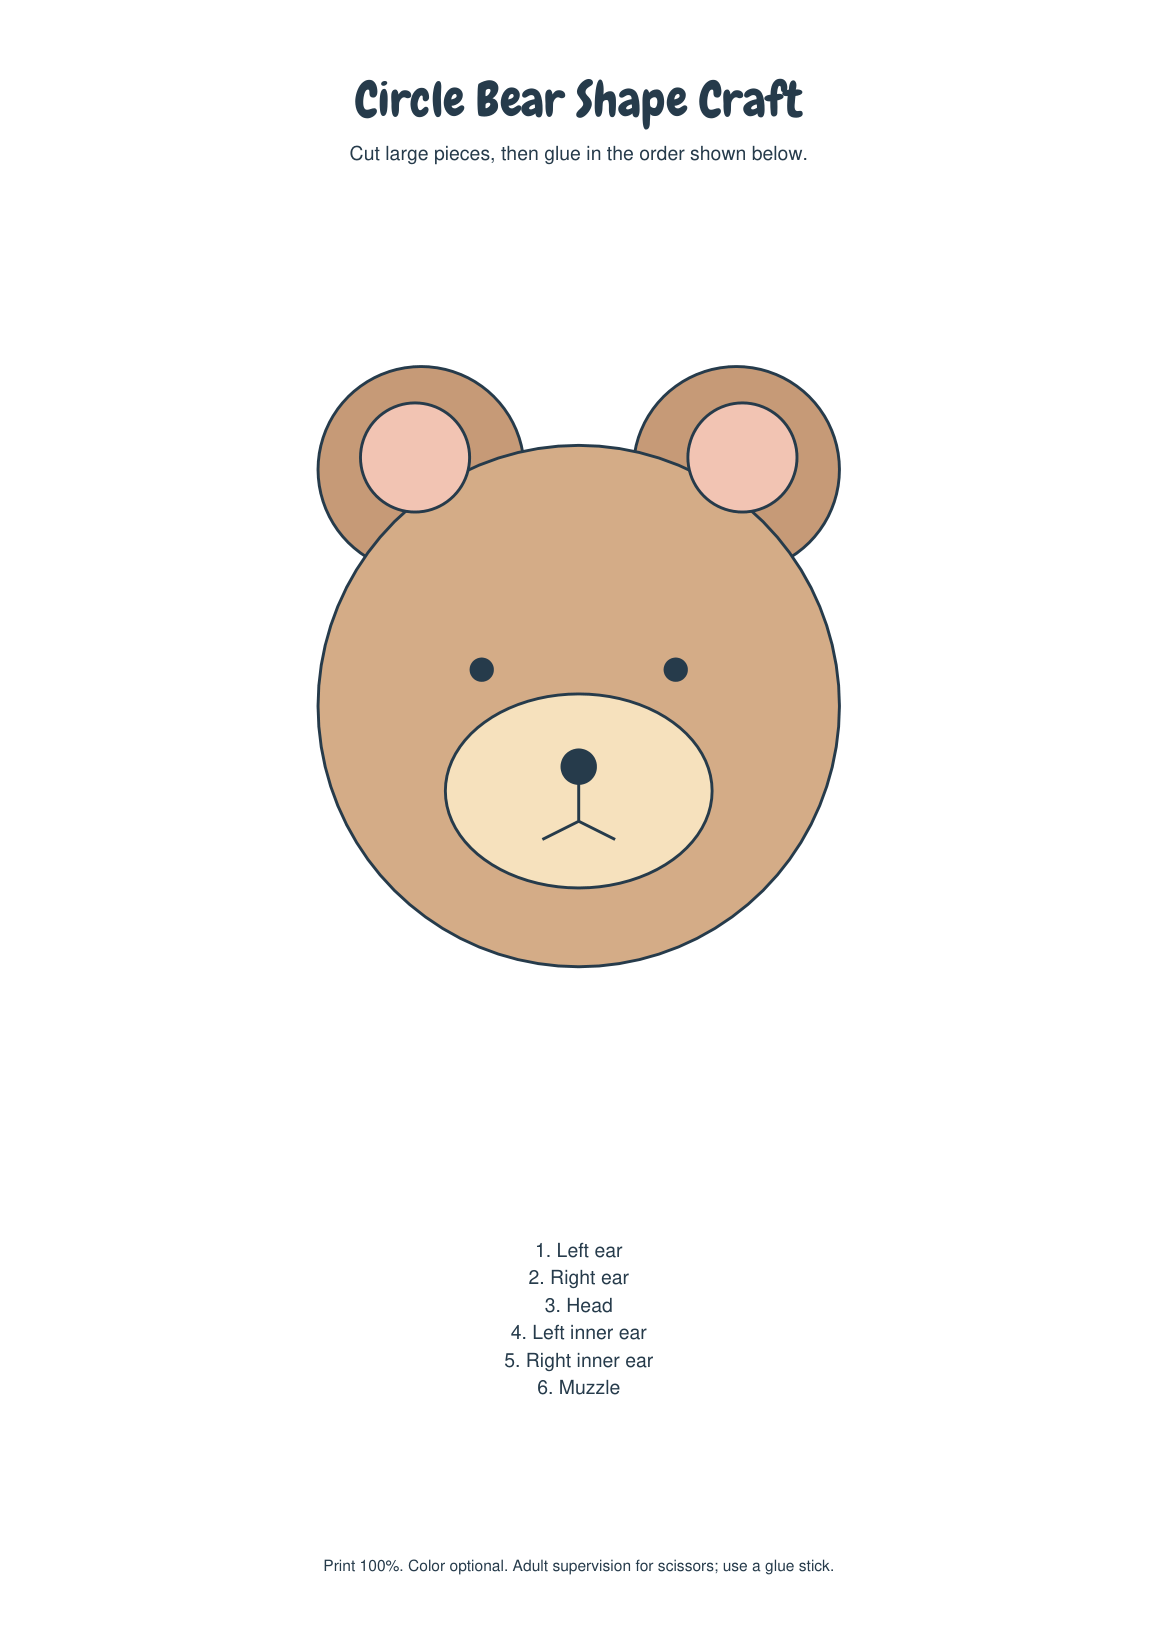
- Place the two outer ears on a plain backing sheet with space between them. The finished reference shows them above the head, with their lower portions hidden behind its upper edge. Do not glue the entire ear circles down until you have checked that overlap.
- Lay the large head over the lower parts of both ears. Center the head so the visible ear tops sit at similar heights. Once the arrangement matches the reference, glue the ears first and the head over them. The printed eyes should remain level.
- Add one pink inner-ear circle over each visible ear. These circles sit high enough to remain visible above the head. Move them into place before applying glue so they do not disappear behind the large head circle.
- Center the muzzle below the eyes with its nose toward the top. The printed mouth should point downward. Glue it over the head, keeping both eyes completely visible. The pale oval stays within the head rather than hanging beneath it.
Check Before Pressing the Glue Down
If the bear seems to have only one ear, lift the head during the dry layout and spread the ears farther apart. If the muzzle hides an eye, move it lower before gluing. The reference uses overlapping circles; cutting a gap into the head to expose an ear is unnecessary.
Press the large pieces flat once their positions are settled. Keep the separate reference page nearby while working rather than cutting it up for extra pieces. If you want another copy for a second picture, reprint the cutting page; the complete pack contains that same cutting page once, followed by the reference.
Download the Printables
Choose A4 (210 x 297 mm) or US Letter (8.5 x 11 inches) for the paper in your printer. The two sizes contain the same designs. The complete file repeats the separate files in one convenient PDF; it does not add extra activities.
Cut Pieces - 1 page: A4 PDF | LETTER PDF
Reference And Order - 1 page: A4 PDF | LETTER PDF
Complete pack - 2 pages: A4 PDF | LETTER PDF