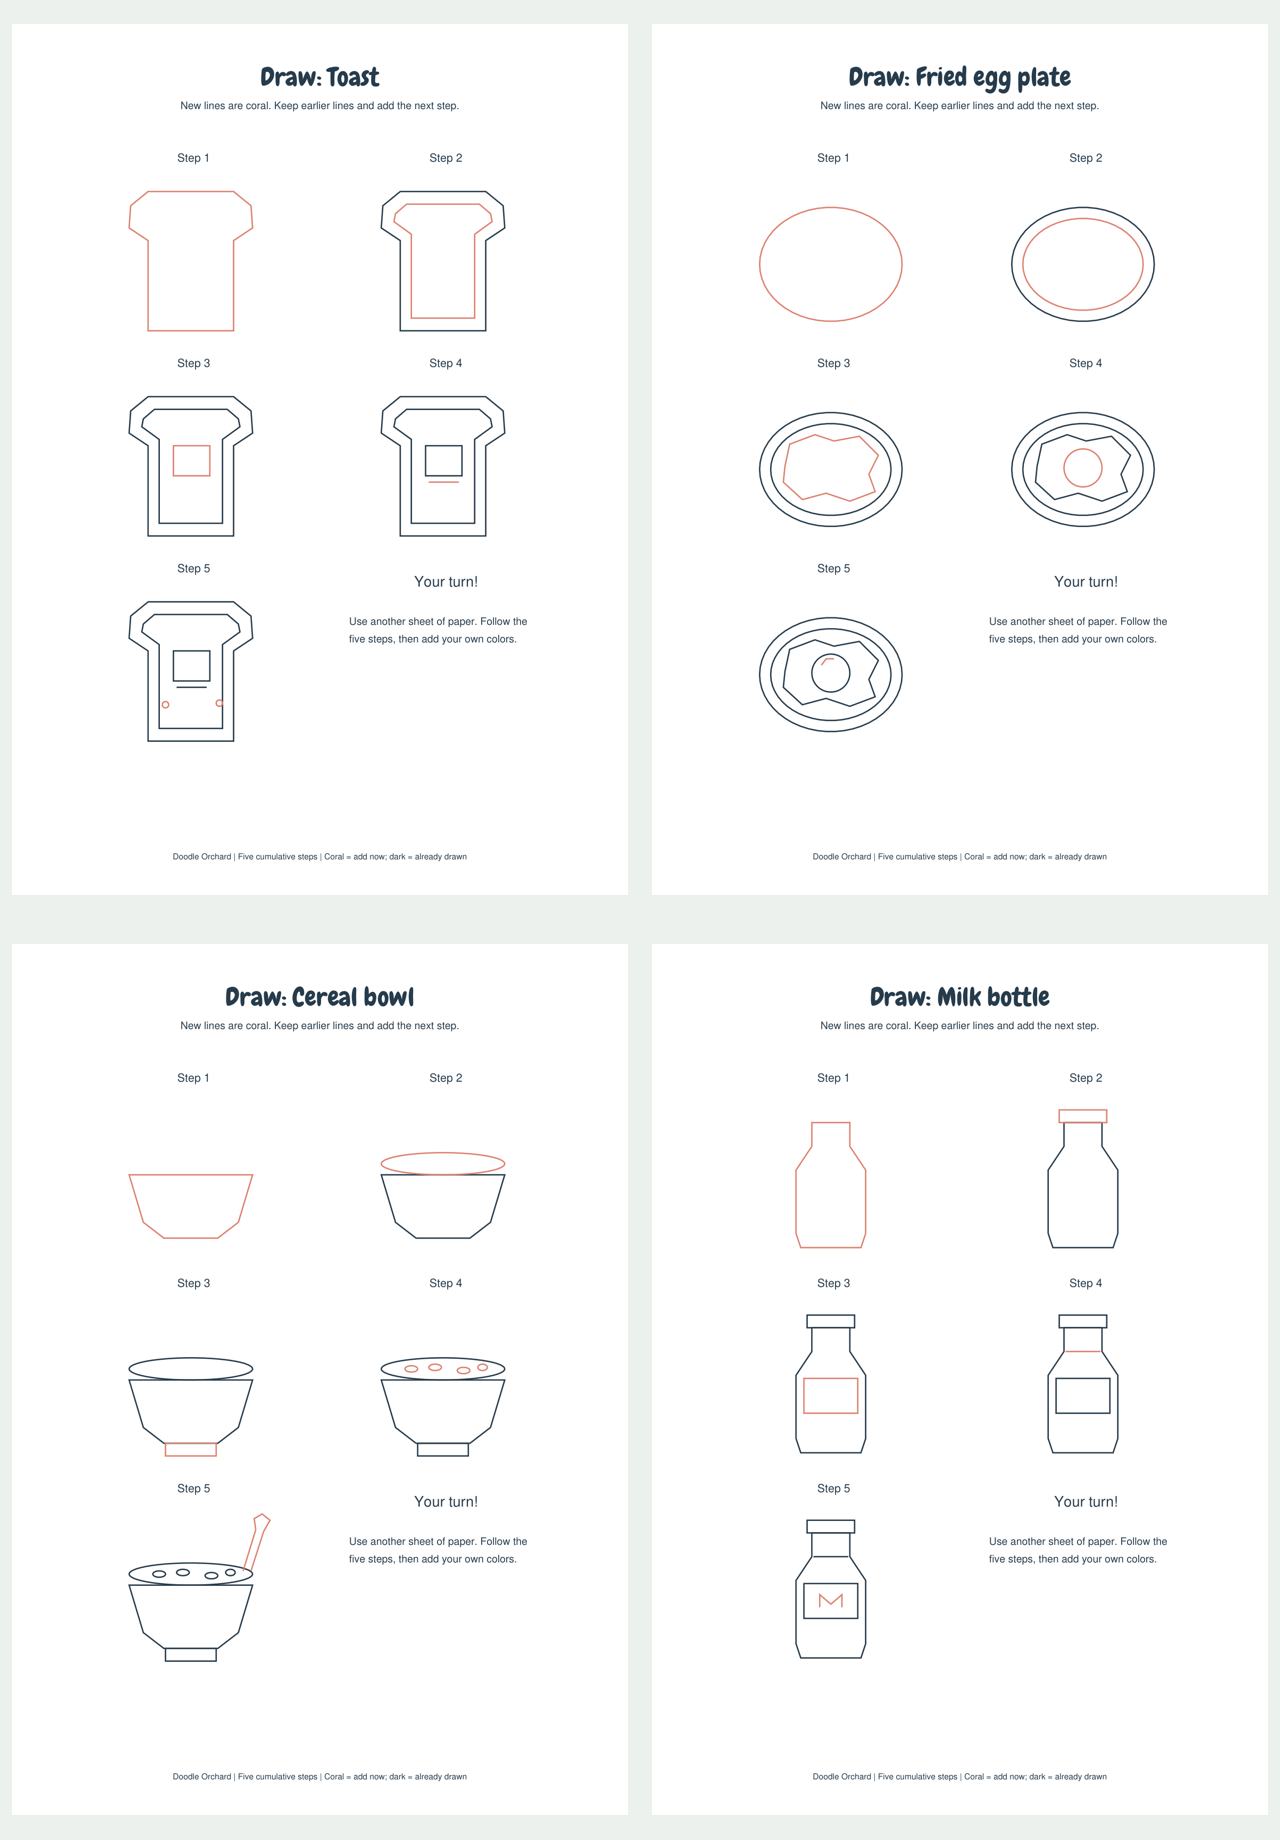
Explore four drawing guides: toast, fried egg plate, cereal bowl and milk bottle. Each object has its own complete page with five cumulative stages. Coral lines show what to add at the current stage; the dark lines show what you have already drawn. The last open panel is a reminder to try the drawing on another sheet.
Set up a Drawing Page
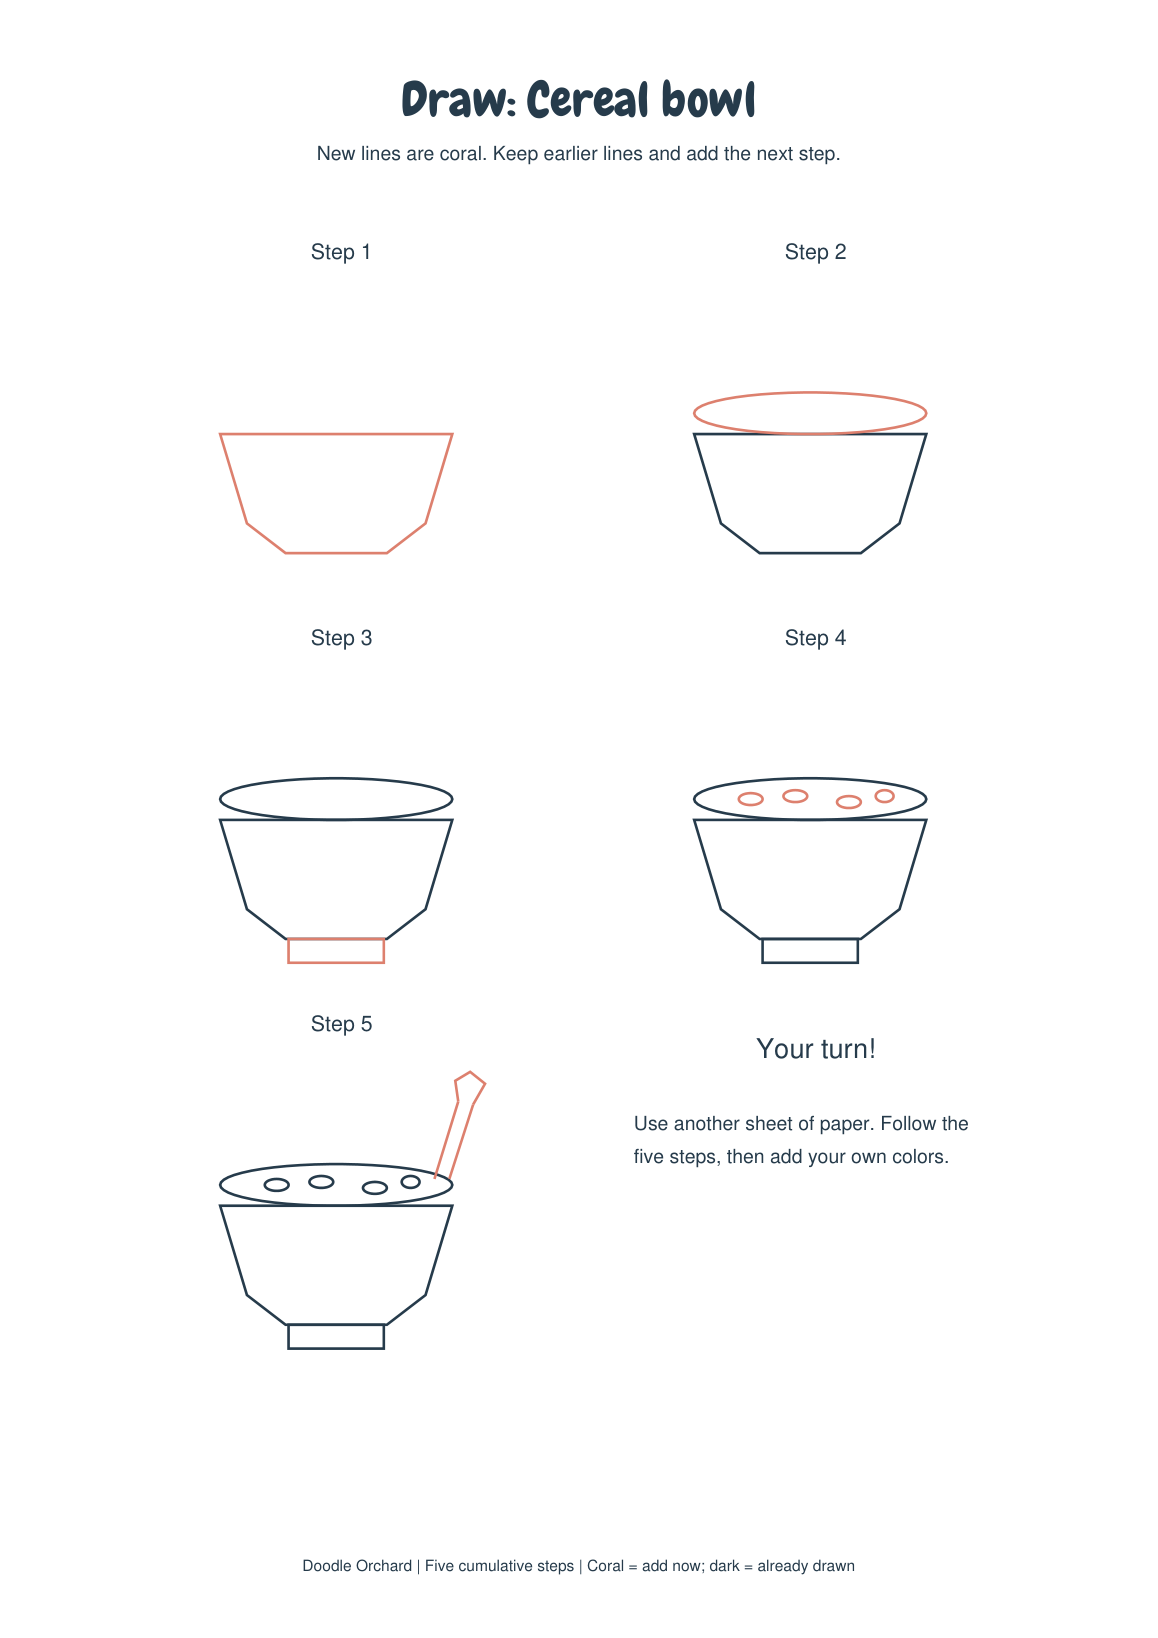
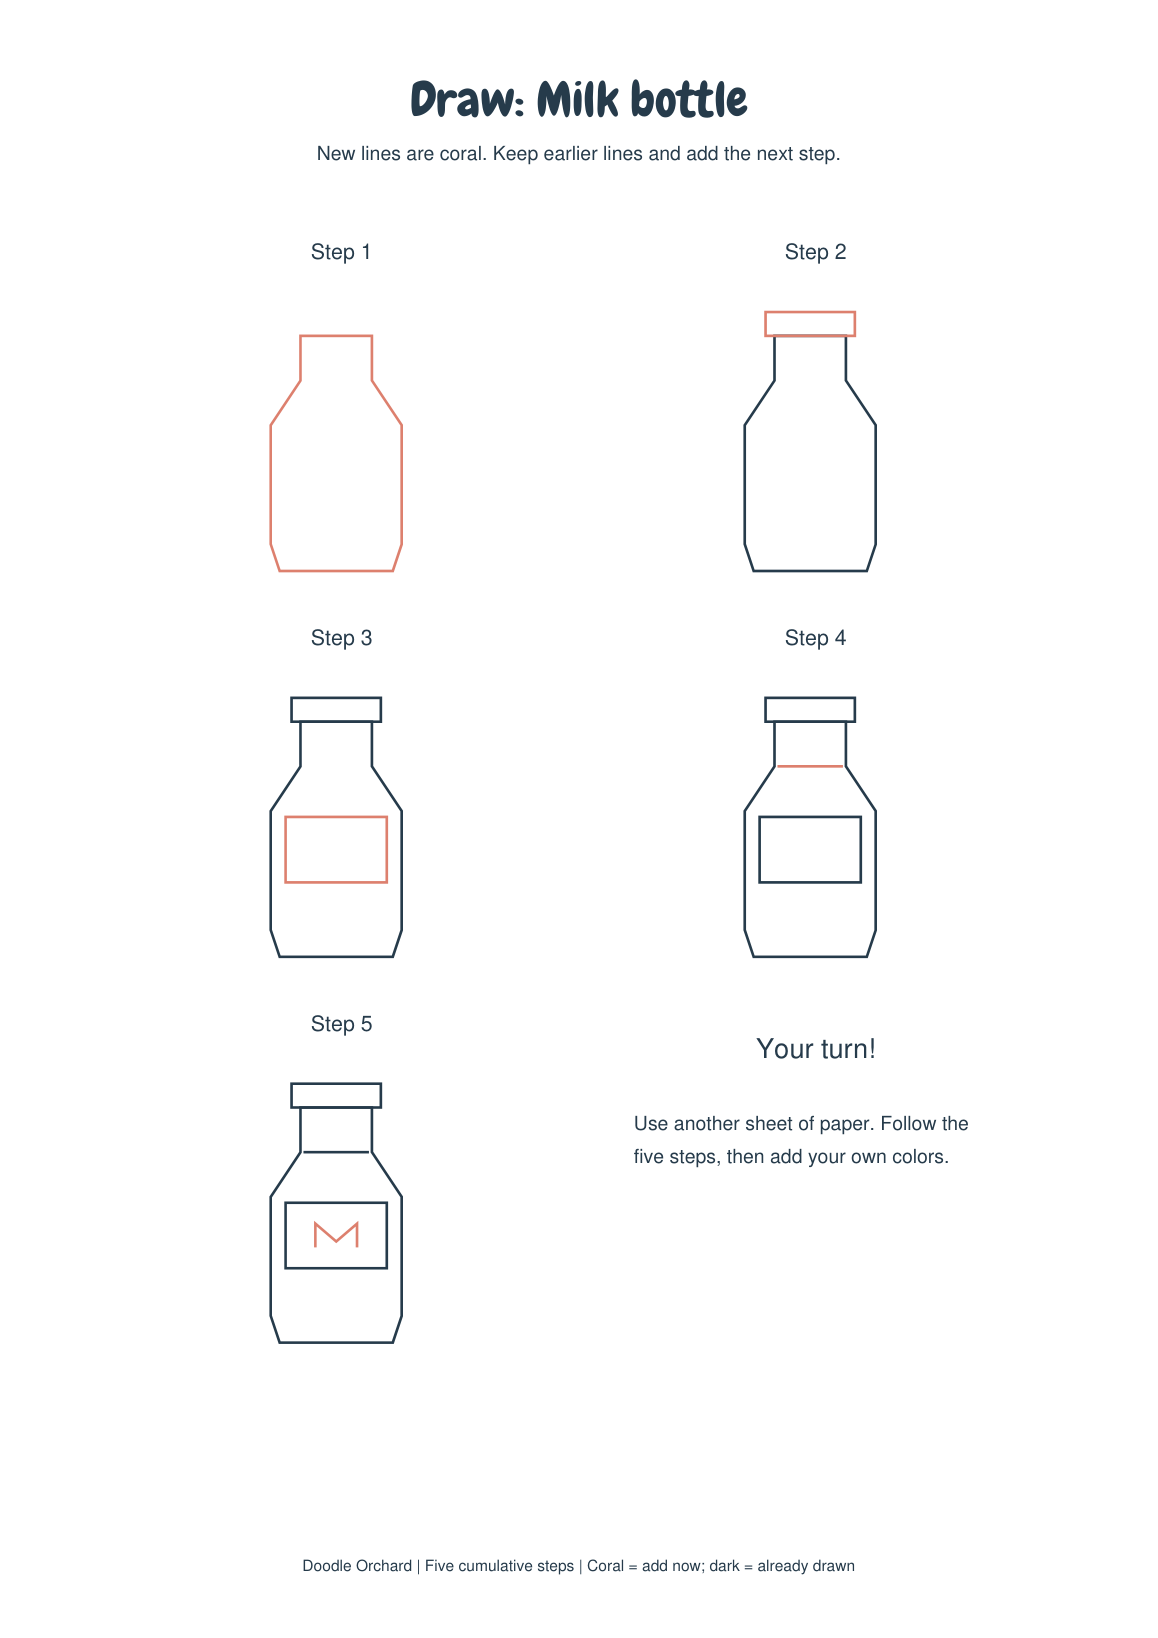
Print in color if you want the coral-versus-dark line cue. Keep the guide whole and put blank drawing paper beside it. Start with a pencil and leave room for the whole object, including details above or below its first outline. Look across the top row first, then the middle row, and finish at the lower-left fifth step. Each panel keeps the object at the same scale and position.
At a new step, keep every earlier line and add only the coral marks. You do not need to redraw the object five times unless you want that practice. The panels describe one drawing growing from its first shape to its last small details.
Toast
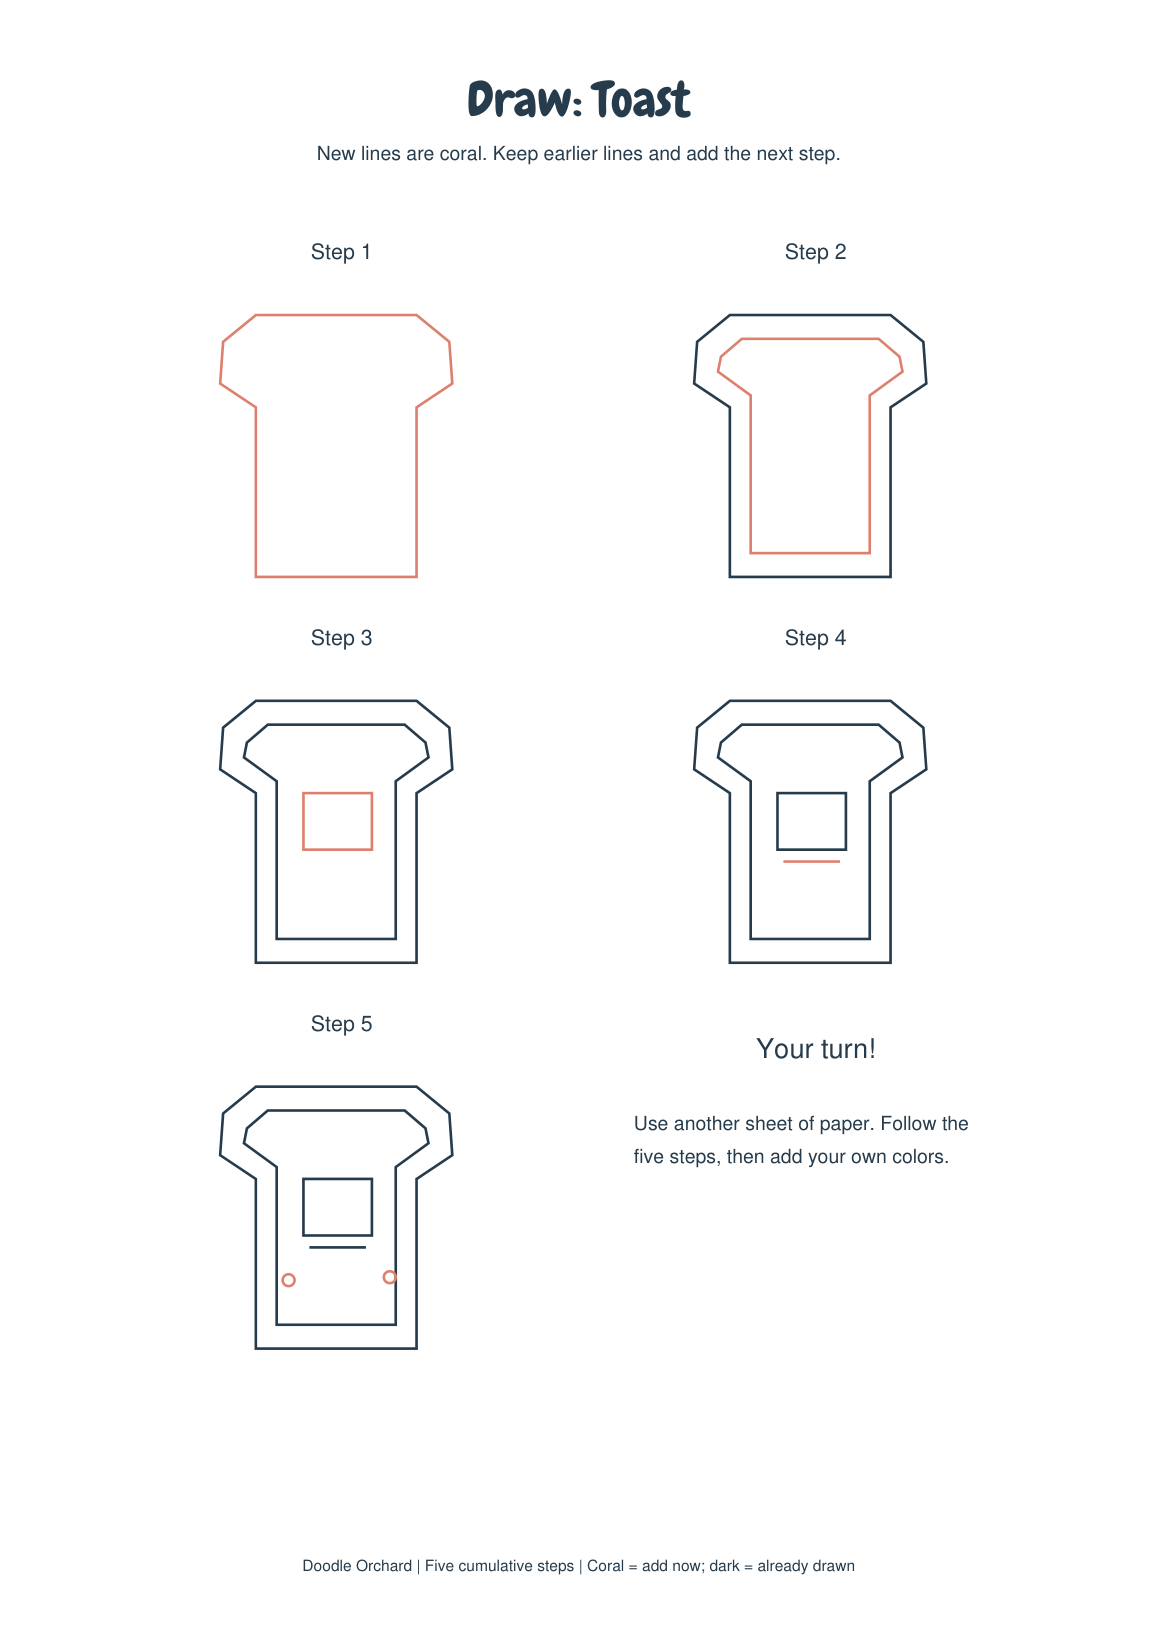
Draw the whole toast outline, including its broad rounded-looking top and narrower lower corners. The next step adds an inner outline following that shape. Put the small butter rectangle in the middle, then add the short line beneath it. The final two tiny circles sit lower down. Keep the butter inside the inner bread outline as the details accumulate.
Fried Egg Plate
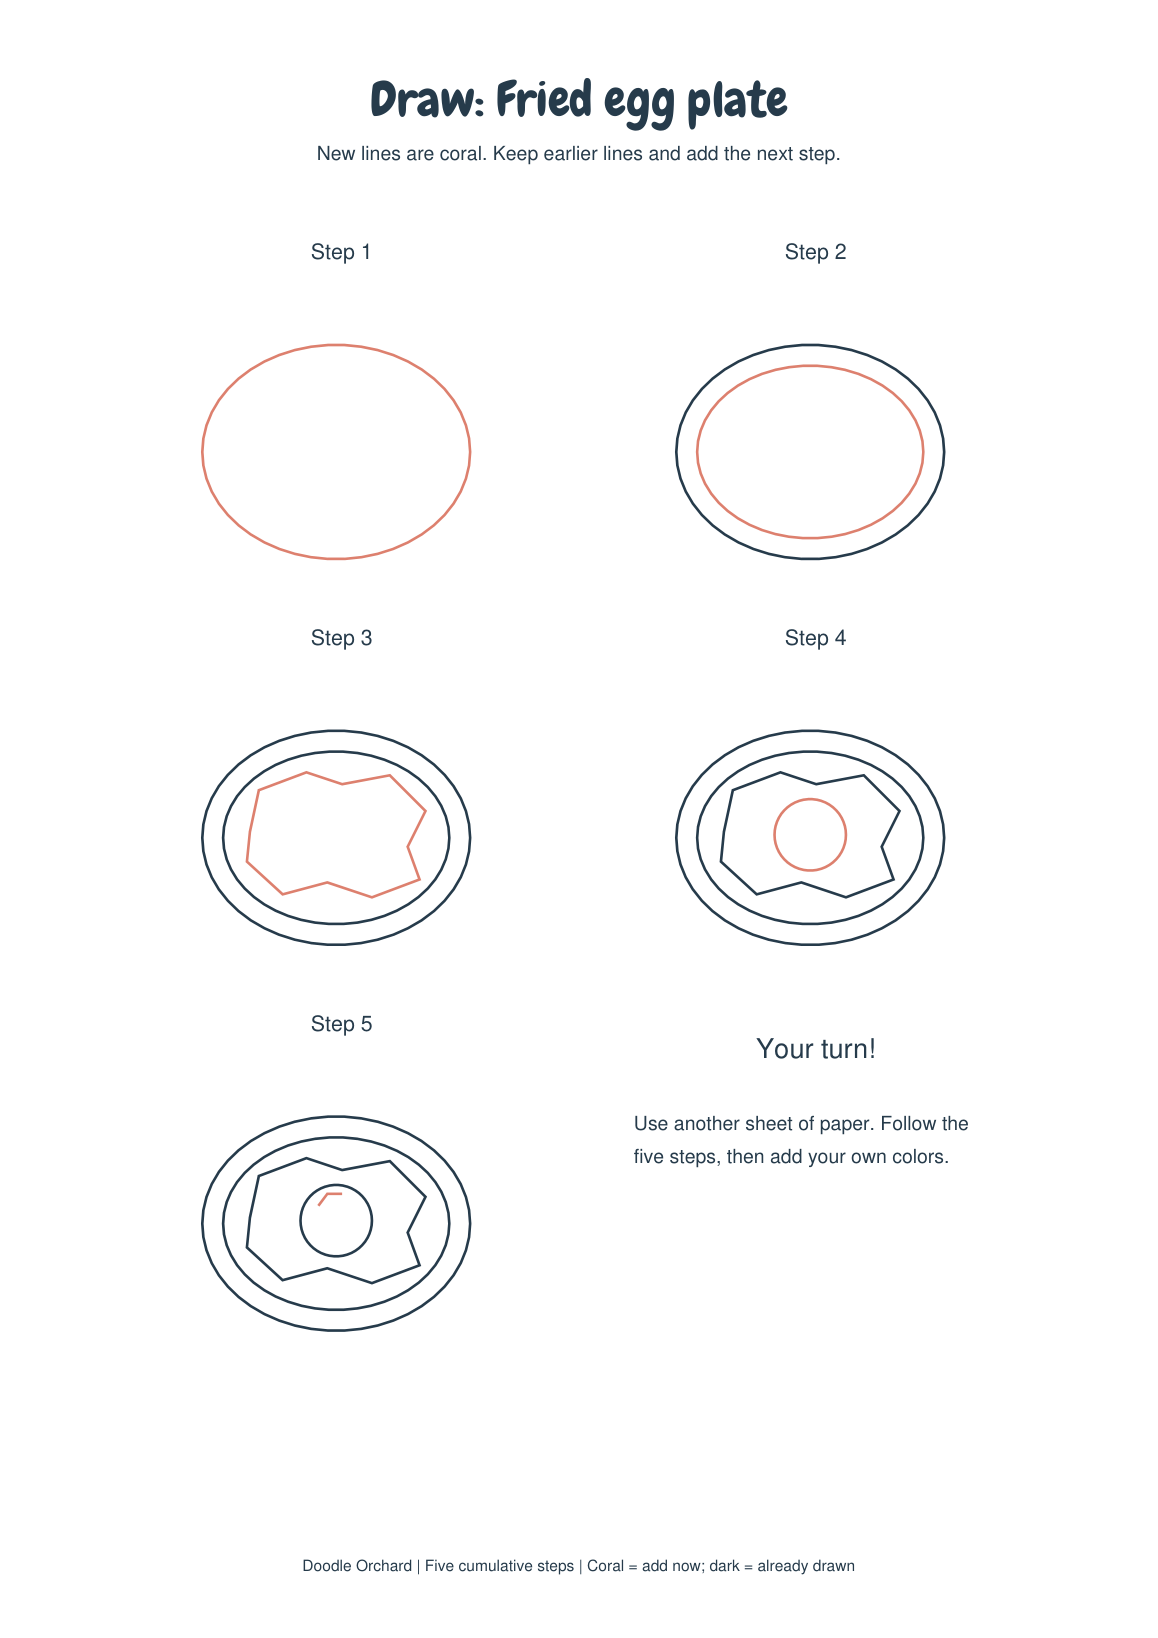
Begin with the wide outer oval of the plate, then draw the smaller inner oval. The third step adds the uneven egg-white shape inside the rim. Put the round yolk near its center in step four. Finish with the little curved highlight on the yolk. The yolk stays within the egg white, and both stay inside the plate's inner oval.
Cereal Bowl
Start with the tapered bowl body. Add the shallow oval at its top, followed by the small rectangular foot beneath the base. The fourth panel puts several little cereal ovals inside the top opening. Finish with the spoon slanting up on the right. Keep its handle above the bowl, leaving the cereal shapes visible rather than drawing through them.
Milk Bottle
Draw the main bottle with its narrow neck and wider body. Add the cap across the top in step two. The rectangular label comes next, centered on the front. The fourth panel adds a short line where the neck widens, and the last adds an M-shaped mark inside the label. None of those details changes the original outer bottle outline.
Keep the Stages in the Right Order
If the next detail seems difficult to place, compare it with the largest outline that is already on your paper. Look for where it touches, where it stays separate and how much space remains around it. Add the main new shape before its smaller marks. There are no tracing boxes to complete on the printed guide: use the example panels as references and make the drawing on your separate sheet.
After step five, you can go over your favorite lines and add colors. Keep the intentional gaps and clear spaces shown between separate parts, rather than joining every nearby line. A detail beside the main outline does not always touch it. Color is your choice; the coral ink on the guide is a step cue, not a required color scheme for the finished drawing.
Download the Printables
Choose A4 (210 x 297 mm) or US Letter (8.5 x 11 inches) for the paper in your printer. The two sizes contain the same designs. The complete file repeats the separate files in one convenient PDF; it does not add extra activities.
Five Step Guides - 4 pages: A4 PDF | LETTER PDF
Complete pack - 4 pages: A4 PDF | LETTER PDF