
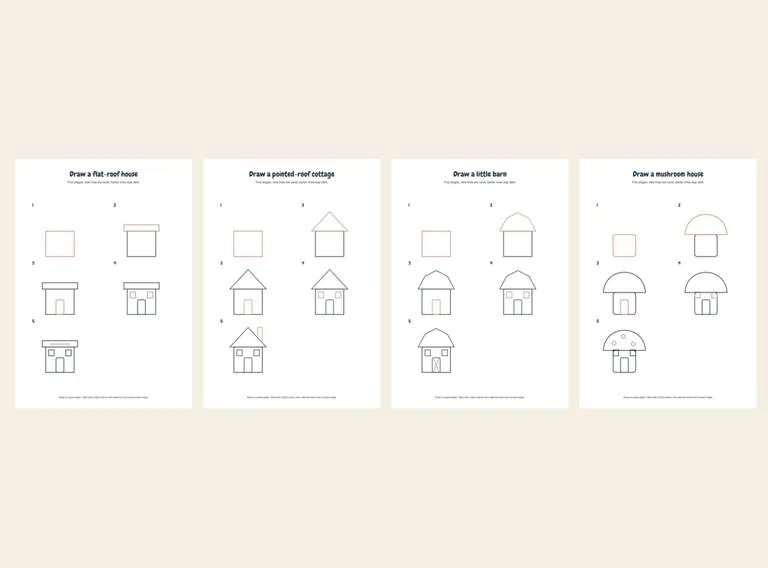
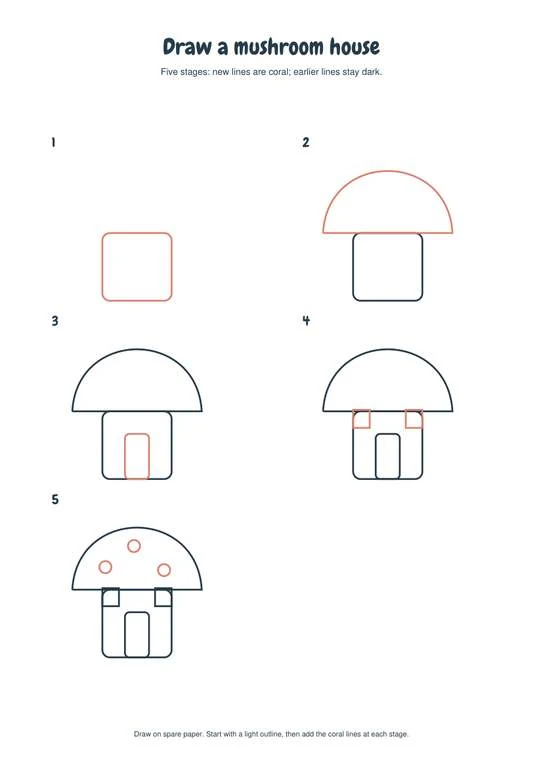
Draw a flat-roof house, pointed-roof cottage, little barn or mushroom house by adding a few lines at a time. Each of these four printable guides has five stages on one page. New lines are coral, while the lines from earlier stages stay dark, making the additions easy to find.
Choose Your Download
The complete pack contains 4 pages. Both paper sizes have the same content. Choose the version matching your paper; downloads open directly without an email sign-up.
| File | A4 | US Letter |
|---|---|---|
| Complete pack (4 pages) | A4 PDF | Letter PDF |
| Four drawing guides (4 pages) | A4 PDF | Letter PDF |
Choose Your House and Spare Paper
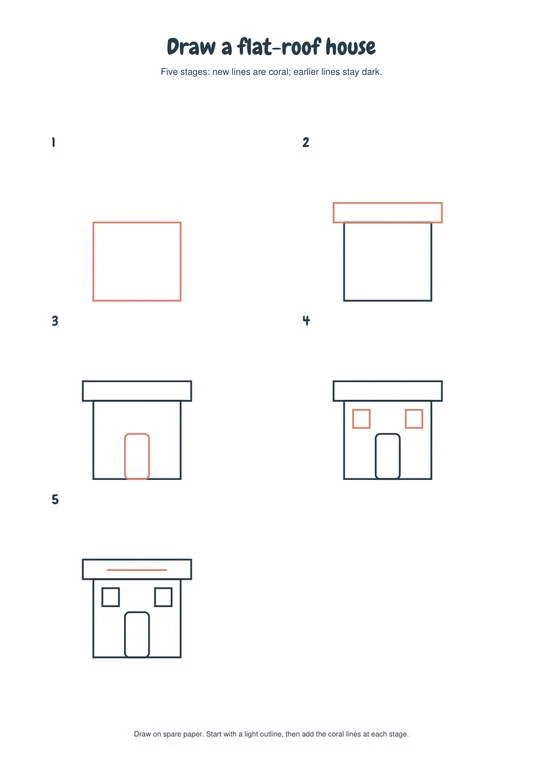
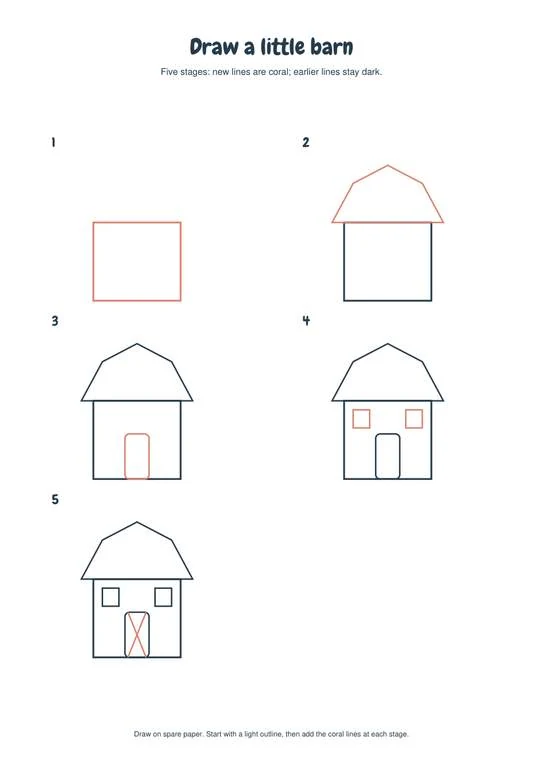
The flat-roof house begins with a rectangular body and gains a shallow roof. The cottage adds a pointed roof and a small chimney. The barn uses a wider, broken-slope roof and a crossed door. The mushroom house has a rounded cap with spots.
Each guide is a drawing reference rather than a tracing worksheet. Put spare paper beside it and choose one house to begin. You can draw larger than the example; keeping the overall parts in proportion matters more than matching its printed size.
Follow the Five Stages
Start with the body in stage 1, leaving space above for the roof and below for the ground if you want to add one. Stage 2 adds the roof. Stage 3 adds the door, stage 4 the windows, and stage 5 the design-specific finishing detail.
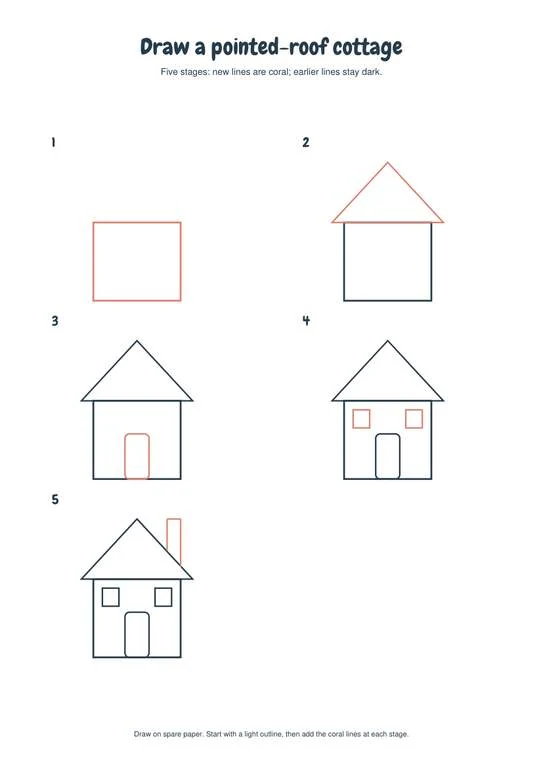
At every stage the earlier geometry stays in the same position. Find the coral lines, add those to your own drawing, then move to the next stage. The color is a guide to what is new; you can draw everything with one pencil. If using a grayscale print, compare the current picture with the one just before it to identify the added shape.
Keep Going After a Wobbly Line
A slightly uneven wall or different roof slope does not prevent finishing the picture. Use light pencil strokes for the first shapes, then continue adding the door and windows. If you want to restart, use a fresh area of your spare paper rather than drawing over the printed guide.
An adult can help by pointing to the next added part without drawing it for the child. Try one complete house first; there is no need to finish all four in one sitting.
Add Your Own Finishing Details
After stage 5, color the house or draw a path, garden or sky around it. Those additions are optional. The printed steps show simplified playful buildings rather than construction plans or perspective lessons.
For another drawing, choose a different house shape and start again from its first stage. Keep finished pictures together as an imaginary village, or leave each as its own small drawing.
Print the Guide You Want
The complete PDF has four pages, one house per page, with no additional cover or answer sheet. Choose A4 or US Letter to match your printer. Portrait orientation and Fit to printable area are suitable because you draw on separate paper.
You may keep the guide on a screen instead of printing it. If you do print, check that all five stage numbers and complete roof shapes are visible on the first sheet.
You may print these files for personal, family and classroom activities. Share this resource page with another adult rather than selling or rehosting the PDFs.