
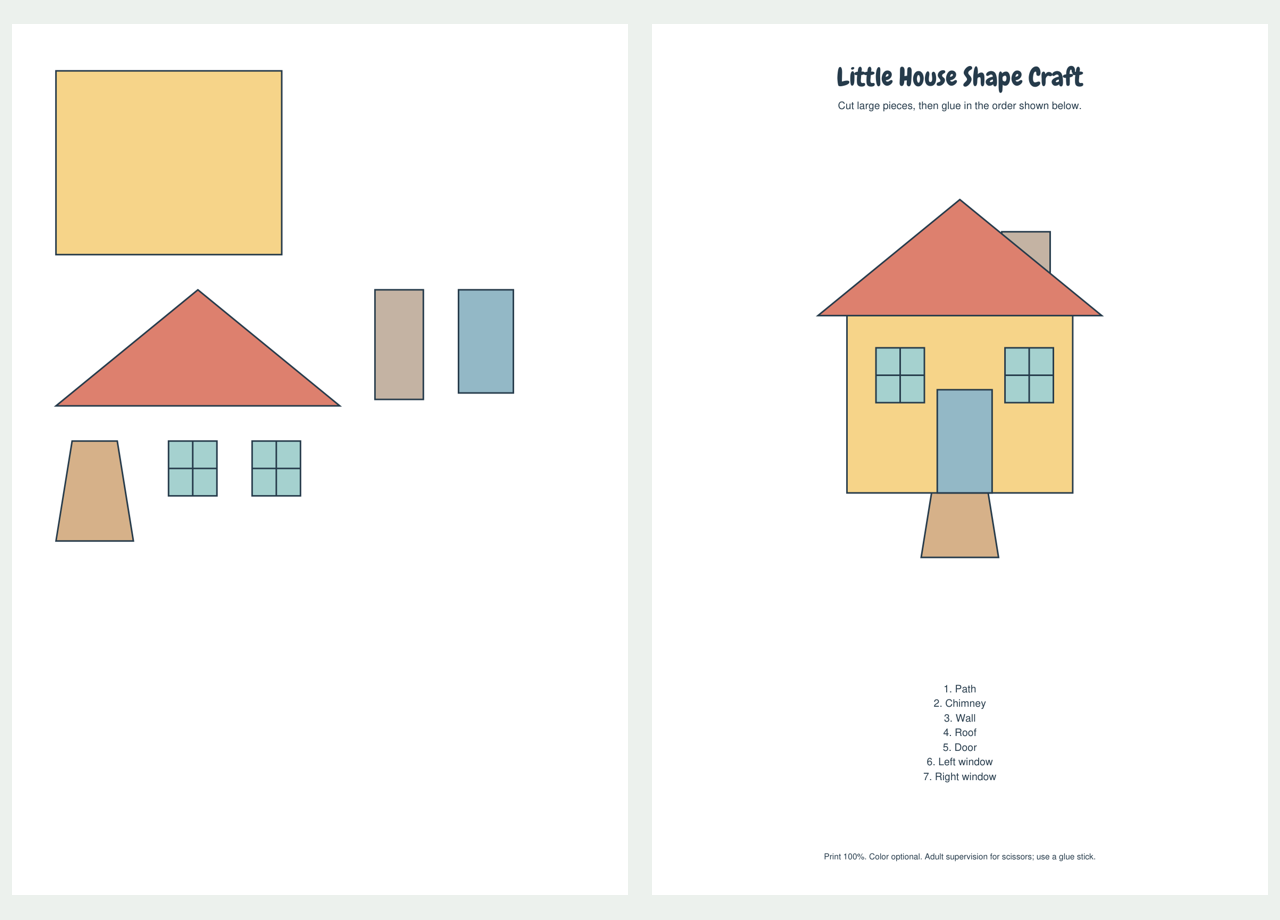
Make a small flat house from seven colored pieces: a wall, roof, door, two windows, chimney and path. The cutting page keeps the shapes separate, while another page shows the assembled house and the order for gluing it. No folding tabs or three-dimensional construction are needed.
Get the Paper and Tools Ready
Choose the A4 or US Letter version for your paper and print at actual size or 100%. Turn off fit-to-page if you want the cutting pieces to match the reference scale. Use ordinary paper for a lightweight picture, or paper/card that your printer can handle. Have a separate backing sheet, scissors and a glue stick ready. An adult can help with cutting. Start by laying the pieces out without glue.
Find the 7 Large Pieces
The large yellow rectangle is the wall and the broad coral triangle is the roof. The tall narrow neutral rectangle is the chimney; the blue rectangle is the door. Both small windows already have crossbars printed on them. The tan path widens toward its lower end. Keep all seven pieces before starting: the two windows count separately.
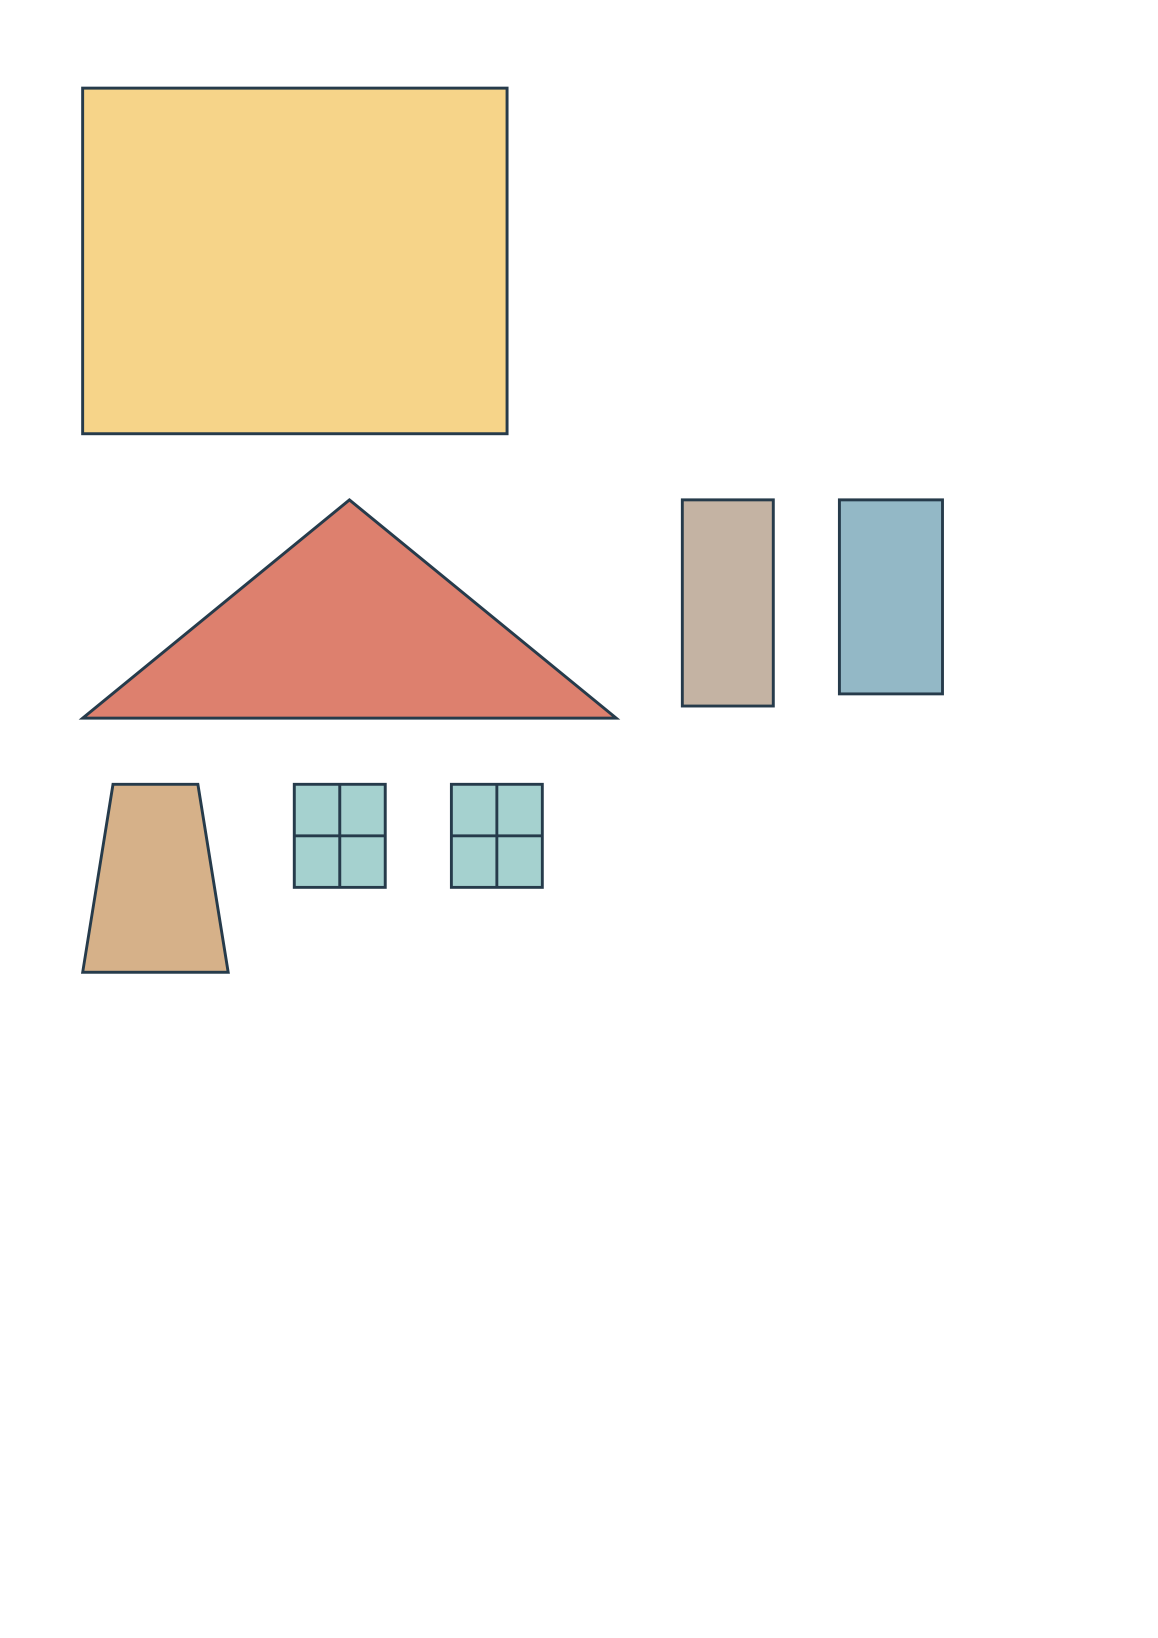
The cutting sheet has no title or footer inside its working area. Cut around each outside shape and keep the printed details on the pieces. The reference uses exactly the same piece geometry and scale as the cutting page. You can choose your own backing color without changing the paper shapes.
Put the Layers Together
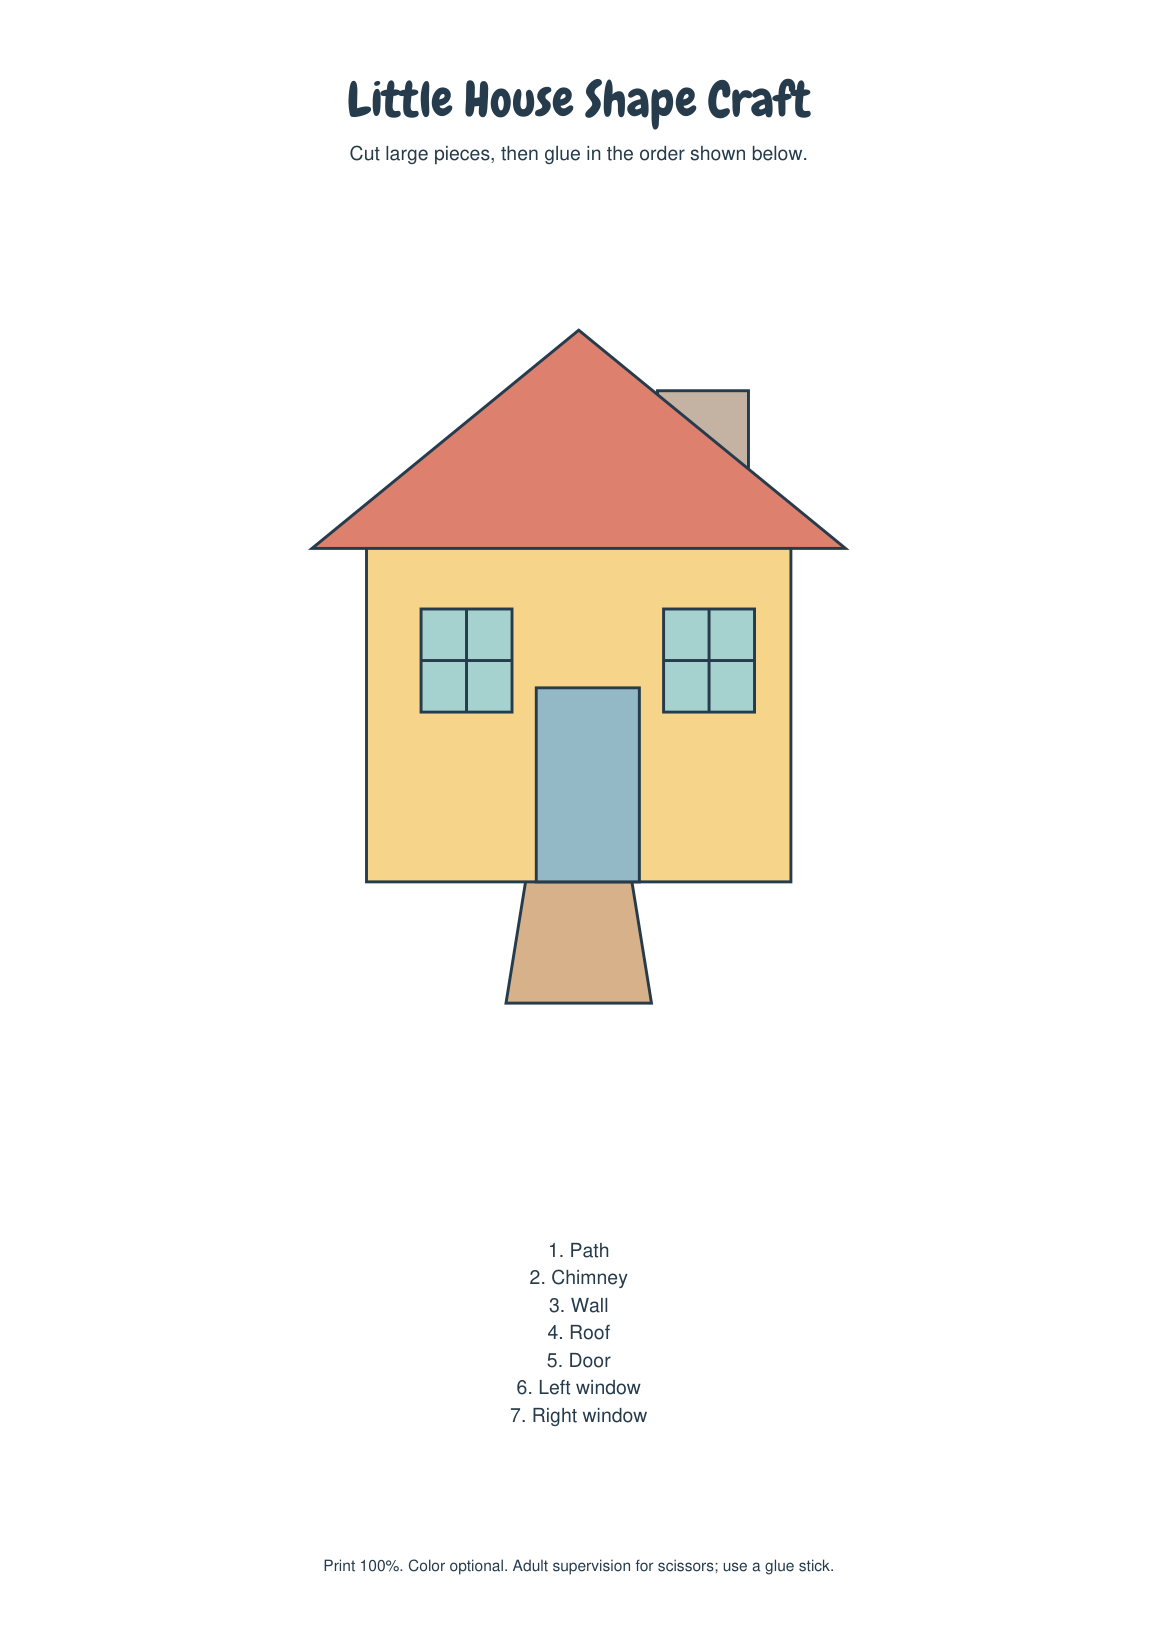
- Put the path near the bottom of a backing sheet with its narrow end pointing upward. Position the chimney above and to the right of where the wall will sit. Their hidden ends need to stay behind later pieces, so first arrange the whole house without glue.
- Place the wall over the upper end of the path. The path should appear to lead away from the doorway at the bottom of the wall. Leave the chimney projecting above the wall on the right. Glue these lower layers once the arrangement is clear.
- Lay the triangular roof over the top edge of the wall and the lower part of the chimney. Its point belongs above the middle of the house. Both roof corners extend a little beyond the wall. Keep the chimney top visible above the right roof slope.
- Add the door at the bottom of the wall, aligned with the narrow end of the path. Place the two windows above and to either side of it. Turn them so their printed crossbars are upright. Glue the door and windows last, after checking their spacing.
Check Before Pressing the Glue Down
A chimney hidden completely by the roof needs to move upward in the dry layout. A path on top of the door has the layer order reversed: the path goes behind the wall, and the door goes in front. Leave the window crossbars intact; those printed lines are not cutting instructions.
Press the large pieces flat once their positions are settled. Keep the separate reference page nearby while working rather than cutting it up for extra pieces. If you want another copy for a second picture, reprint the cutting page; the complete pack contains that same cutting page once, followed by the reference.
Download the Printables
Choose A4 (210 x 297 mm) or US Letter (8.5 x 11 inches) for the paper in your printer. The two sizes contain the same designs. The complete file repeats the separate files in one convenient PDF; it does not add extra activities.
Cut Pieces - 1 page: A4 PDF | LETTER PDF
Reference And Order - 1 page: A4 PDF | LETTER PDF
Complete pack - 2 pages: A4 PDF | LETTER PDF